| The rear shocks on the VF series motorcycles are not the
greatest design that Showa has ever released. Many people believe
that these shocks cannot be rebuilt at all, while others think that the
springs cannot be removed. Some people don't even think they have a
spring inside! Below you will find a step-by-step procedure on how
to not only rebuild the unit but also replace the spring. |
|
|
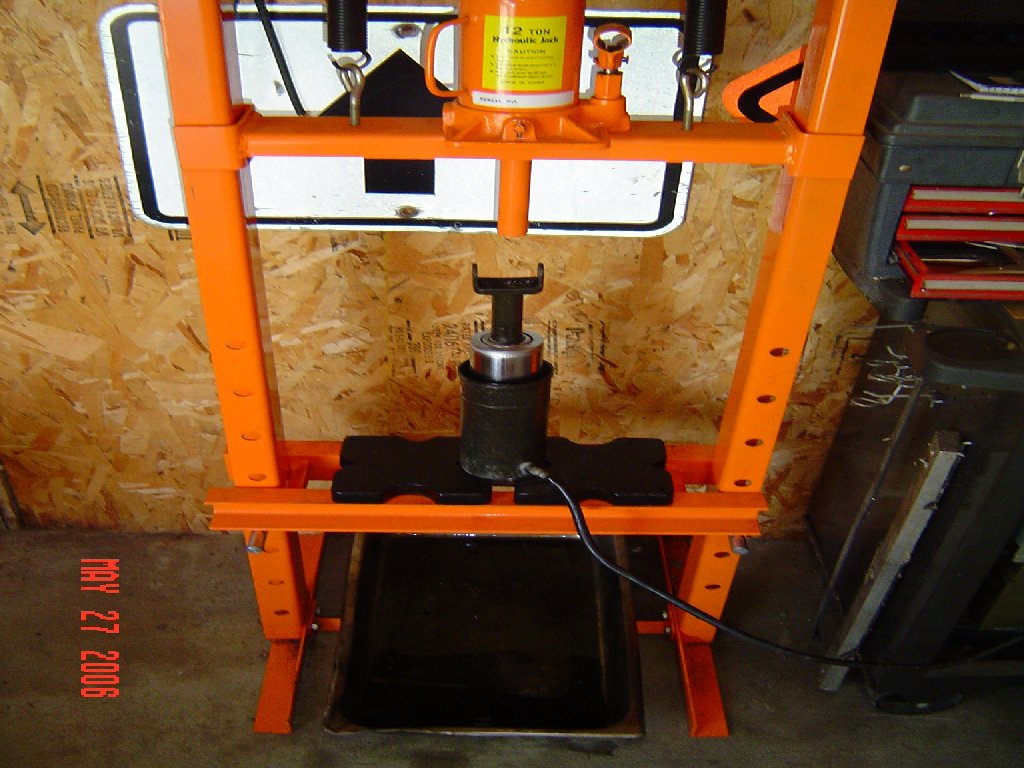
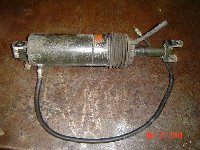
This is what a typical rear shock
looks like after it's been removed. This particular shock is a
VF1000R unit, but of course the F's and 700/750 are the same.
The VF500's are slightly different, I'll try to make notes along the
way.
|
|
|
|

|
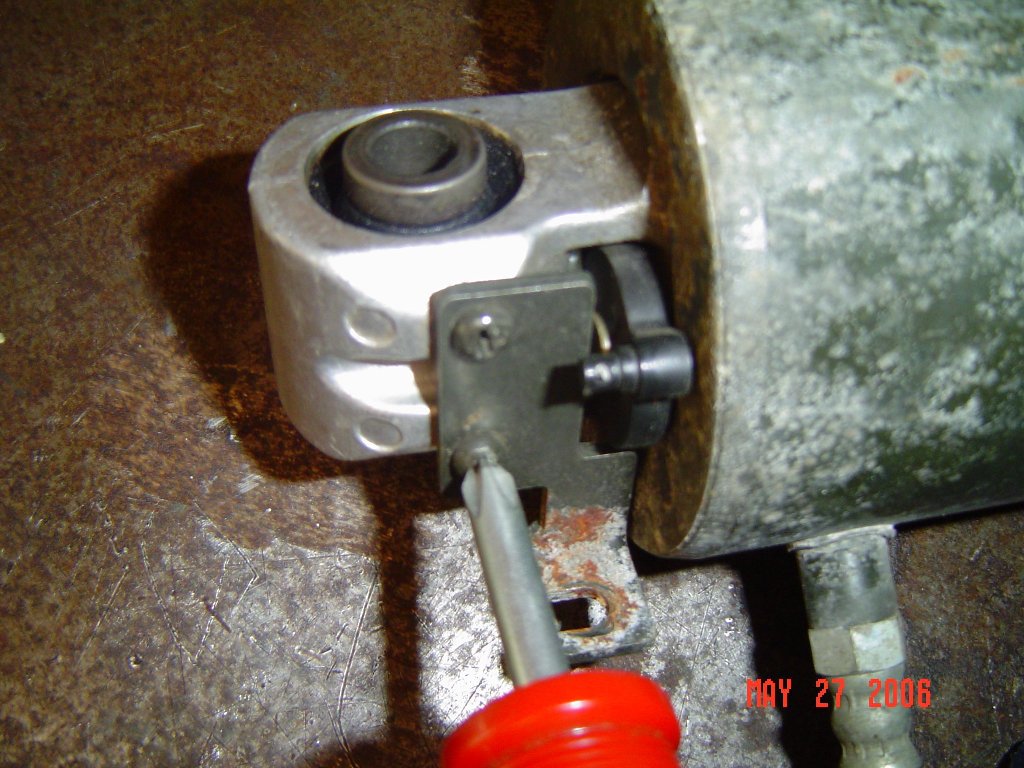
The first step is to remove the damping adjustment
cable and bracket. Make sure to hang on to the cotter pin and
washer. If you are only doing a fluid/seal change you can
skip this step. The 500's don't have a cable, so you guys can
skip this too.
|
|
|
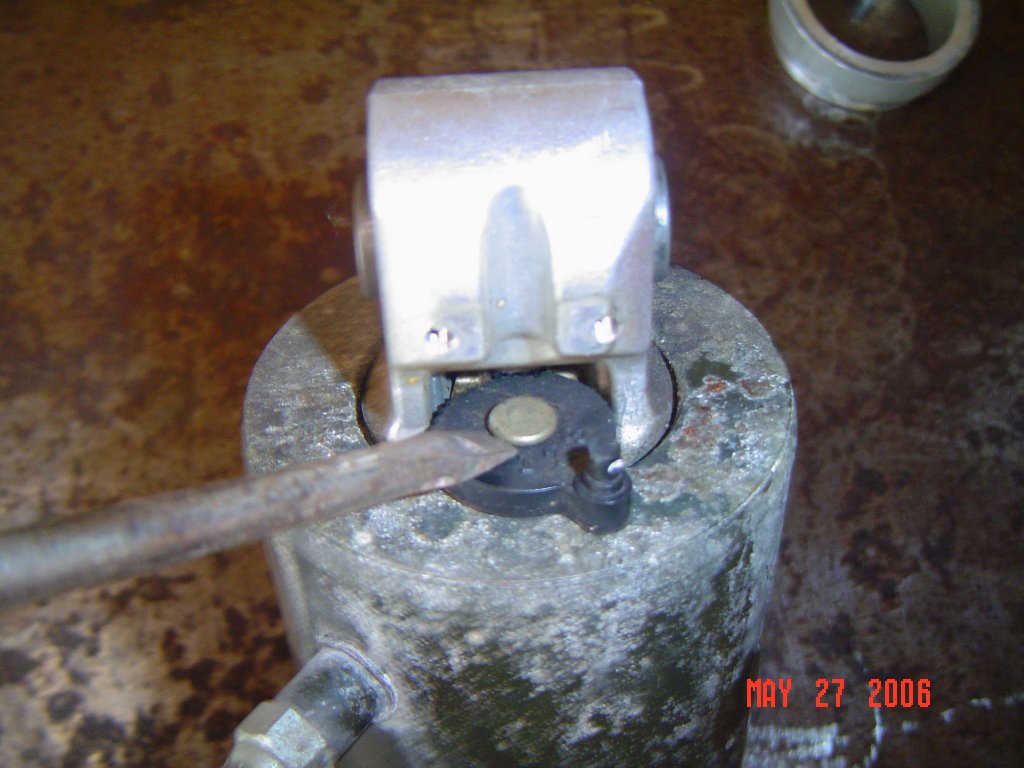
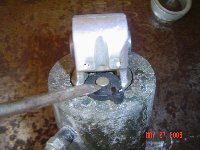
Here is the first part that can be tricky. You
must remove the adjustment lever in order to separate the case from
the shock internals. I always set the damping to #1, but either
way make sure to note the lever position. Be careful not to bump
it during the process.
|
|
|
|
|
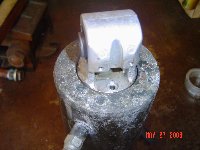
Now it's time to remove the pivot
pin. To do this start by taking a chisel or a sharp
screwdriver. Tap under the head of the pivot pin to drive it
out. Work it slowly from both sides as not to bend it. It
might be difficult at first, but once you get it started it should
come out easily.
|
|
|
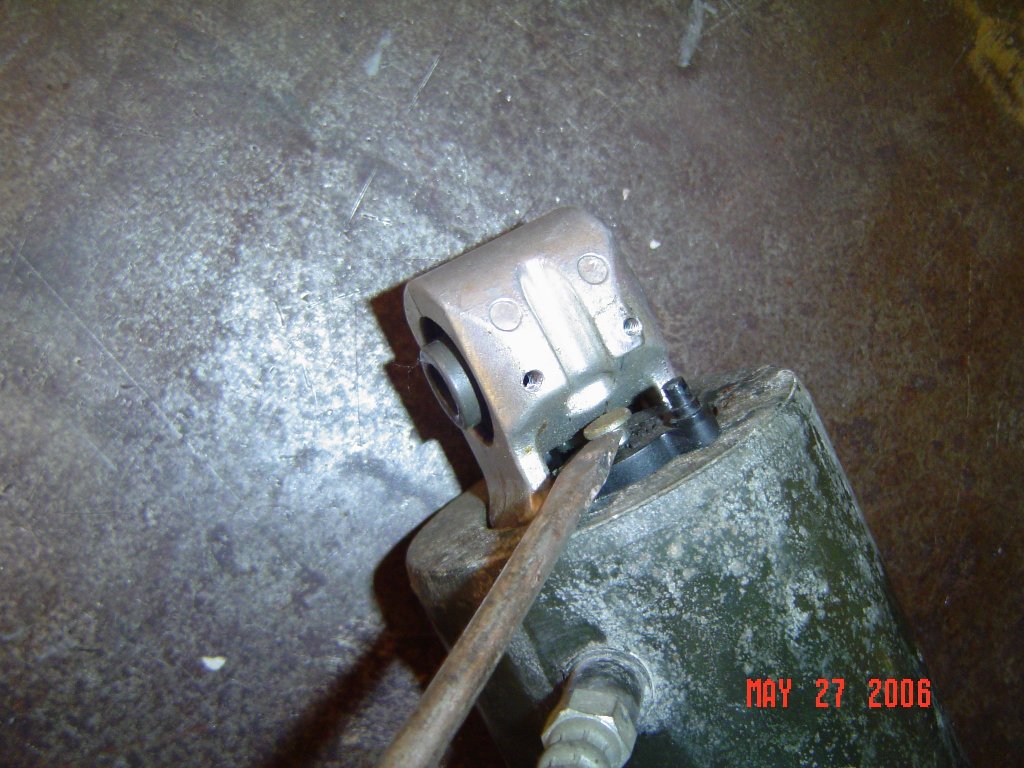
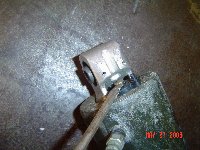
Here is what the upper clevis looks like after the
lever has been removed. At this point I like to mark the
orientation of the air preload hose to the clevis. If you forget
you'll never remember which way it's supposed to go!
|
|
|
|
|
Next you should remove the lower boot from the
shock. Be careful not to rip or tear it.
|
|
|
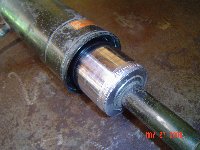
This step requires some special tools. I've
chosen to make my own, but the Honda ones work well too (from what
I've heard). Shown here is the tool that will press down on the
seal retaining ring to expose the circlip.
|
|
|
|
|
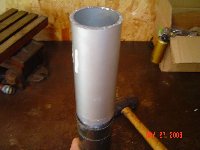
This tube allows me to hammer down on the retaining
ring. This is always necessary as the seal is pressed into the
case. You only need to push the ring down 4-5mm or so.
|
|
|
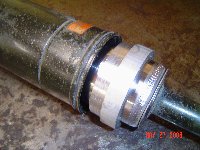
Here you can see the exposed circlip. Use a small
screwdriver to hook it out. This can sometimes be easier said
than done. It takes a little bit of a touch, so don't get too
frustrated.
|

|
|
|
|
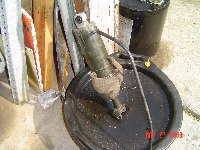
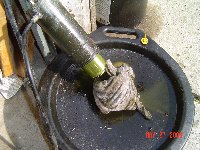
With the circlip removed it's time to get the retaining
ring, seal and case guide bushing out. The seal will come flying
out, so you'll want to cushion it a little. I tie three or four
old shop rags around the lower shock. Make sure they are really
tight or else they won't help much. This is going to be a mess,
so laying the shock in a catch pan helps. Also note that I do
this at the garage door just to be that nothing gets splashed.
|
|
| Use the air preload tube and apply pressure in small
pulses. I use 100psi, and sometimes it takes all of it.
Things are usually really quiet until...POP! This part is not
for you jumpy people. Notice how the rags caught the parts on
their way out. Also notice the fluid running everywhere.
|
|
|
|
|
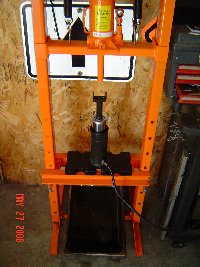
Once again, if you only changing fluid and seal you can
skip this step. Now it's time to separate the shock internals
from the case. This will also remove the spring.
Spring?!?! Yes, there is one inside there, you'll see.
|
|
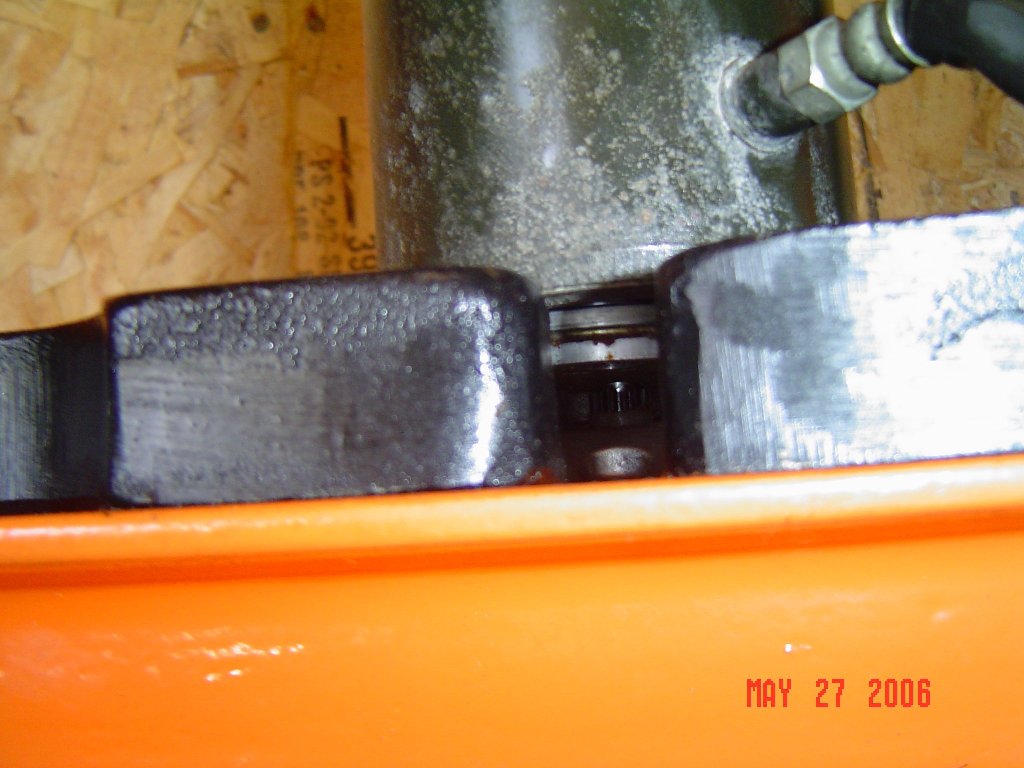
| Press down on the lower clevis until the upper clevis
begins to push out of the case. If you look closely you can see
the o-ring seal and circlip that holds everything together. Take
your screwdriver again and remove this circlip. You can remove
the o-ring if you like too, but it's not necessary. Be careful
here, if the shock slips out of the press you'll get a whack on the
head. This is where I'm the most paranoid, please be safe.
|

|
|
|
|
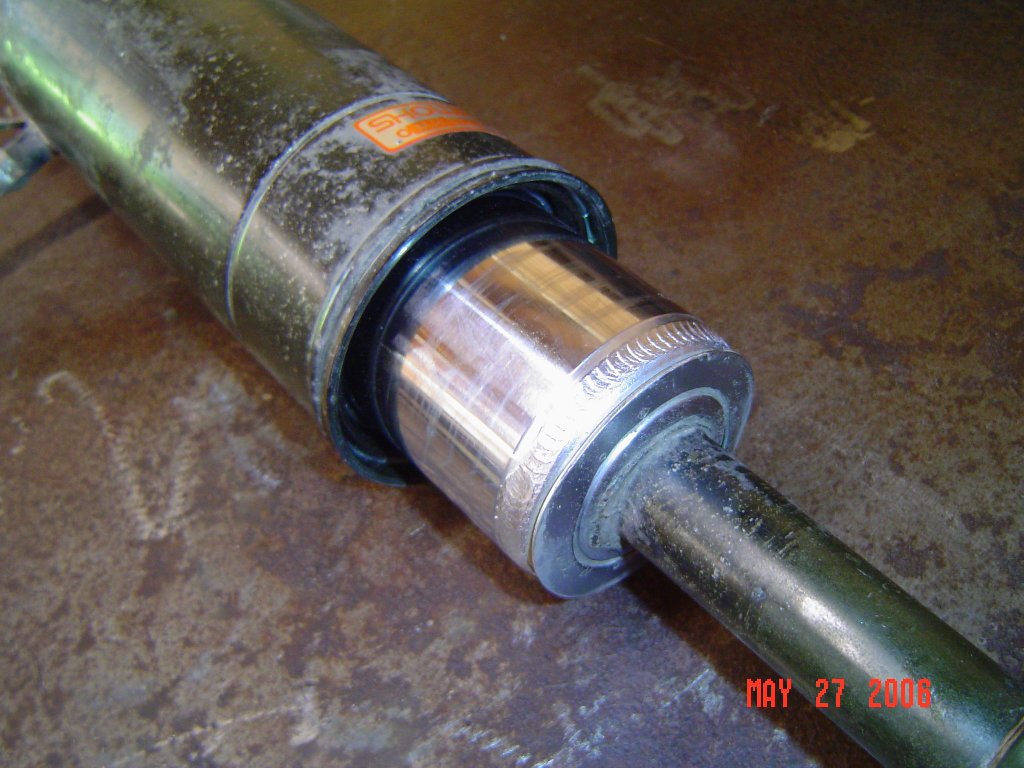
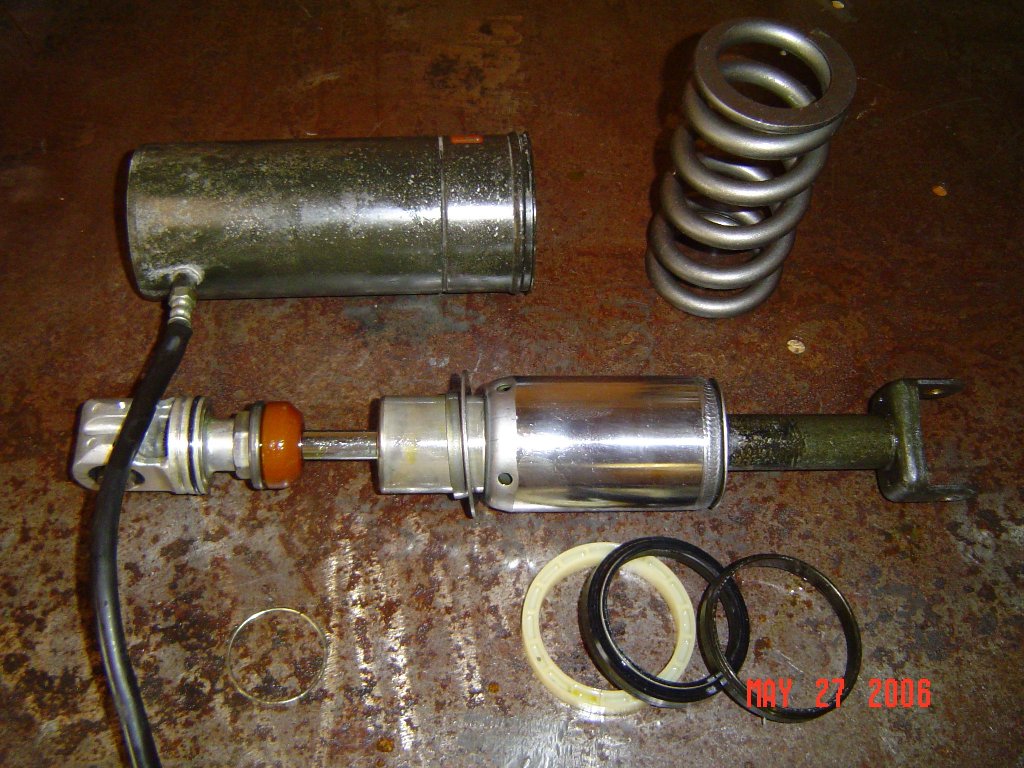
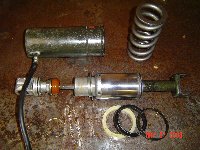
Here is what the parts will look like when
removed. See the spring? I told you it was in there.
This is about as far as you can go. The shock internals are
welded together. Inside the large chrome part is where the
valving is. The small piston rod coming out the top is sealed by
an o-ring. The deterioration of this o-ring is what causes the
failure of most shocks.
|
Assembly is the reverse of what I've shown above.
I hate it when people say that, but it's basically true. Here
are a couple of helpful hints to use on the way:
- Do not try to clean out the internal
valving. I've found that running solvent through there will
only make things work. If you shock was functioning ok
before, leave it alone.
- Don't use the Honda manual spec for fluid volume,
this is an error. It should be 320cc for all shocks.
Usually I add a little more to help with bottoming resistance,
typically 340-350cc.
- Use the retaining ring tool to press in the new
seal parts. I like to do this one at a time. Case
guide bushing first, then seal and retaining ring last.
- Don't forget to install the damping adjustment
lever back in the position it was in when removed. This also
applies to the orientation of the hose to the upper clevis.
|