|
|
Home
\ How To \
Forks \ Fork Springs and Fluid
| The
following pictures and descriptions will help guide you through the
installation of new fork springs on your motorcycle. Please
note these apply only to conventional (not inverted) forks.
The forks shown below are cartridge style but a similar process can
be used on damping-rod forks.
|
|
|
Fluid Height
|
|
|
Ensuring the forks have the proper amount of fluid is essential
for proper operation. For this you must measure the actual height of the fluid
inside the fork. This is a much more accurate means to fill the forks
than using fluid volume.
The idea here is that there is enough fluid in the forks to satisfy
the damping and lubrication needs of the forks while at the same
time creating a specific air gap above the fluid. This air gap
can be used as a tuning device to prevent bottoming.
|
|
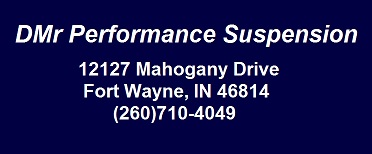
Start with the fork
sitting vertical with the cap off and the spring out. For
cartridge forks you will need some means to pull up and down on the
rebound (damping) rod. I prefer to have the fork off the bike
and in a vise as shown. Before
the level can be set the fork lower portion must be fully bled of
any trapped air. Using
the appropriate weight, add fluid to the fork. Begin with
about 1/4 quart. You may hear a bubbling or gurgling sound
while adding the fluid.Next
you need to bleed the cartridge and fork body. For that you first take the
stanchion tube (the chrome outside tube) and cycle it up and down
fully through it's stroke. Make sure extends through the ends
of travel, this will get the air out of the chamber between the
stanchion and lower slider. If you continue to hear gurgling
sounds after a few cycles add another 100cc of fluid and continue
bleeding. Next
you will need to cycle the damping rod in a similar fashion.
At first you may not feel an resistance. To get the cartridge
primed you may need to cycle the damping rod fully through it's
entire stroke several times. As the fluid starts to fill from the
bottom you will begin to feel a noticeable resistance. Cycle
the damping rod fully until you feel a smooth action with no
skipping. During this time be careful as fluid may try to
squirt out of the top of the damping rod.
|
|
|
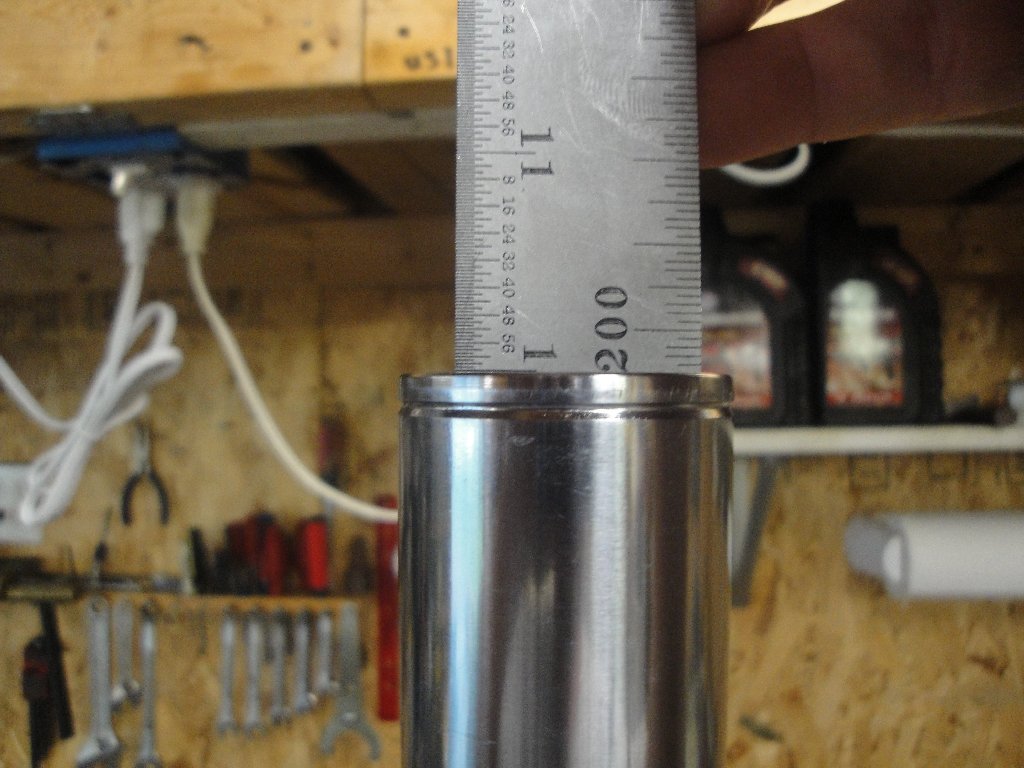
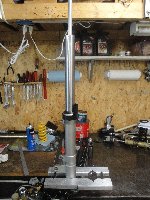
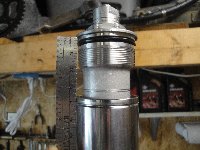
Once the fork is fully bled you will begin
to set the fluid level. I choose to use a metal ruler for this
step, but any clean object can work. The idea here is that we
are creating a dipstick of sorts. For the forks shown the
desired fluid height is 120mm. This measurement is taken from
the top of the stanchion tube. Make sure the fork is completely
compressed. There is often an oil lock device at full
compression that will provide some resistance, make sure you are fully
pushed through it.
I use a number larger than the fluid
height I am shooting for. In this case I pick 200mm. Since
I want 120mm, I am looking to see the fluid mark on the ruler at 80mm
(200-80=120). Fill slowly and check often as it is easy to
overfill past your mark.
You are done with setting your fluid
height! See, that was easy.
|

|
|
|
Spring Preload Setting
|
|
|
When setting up forks it is often
required to replace the springs with the correct rate for that
particular rider. Aftermarket springs are often a different length
than the stock springs in the forks. Manufacturers will also
typically use a soft spring combined with an excessive amount of preload
in order to make the setup applicable for a wide range of riders (it
doesn't work, unfortunately). because of these factors, it is
almost always necessary to use a new spacer tube inside the forks.
It can be a mystery how to know what the length should be, the steps
below will outline to determine the correct spring spacer tube length.
|
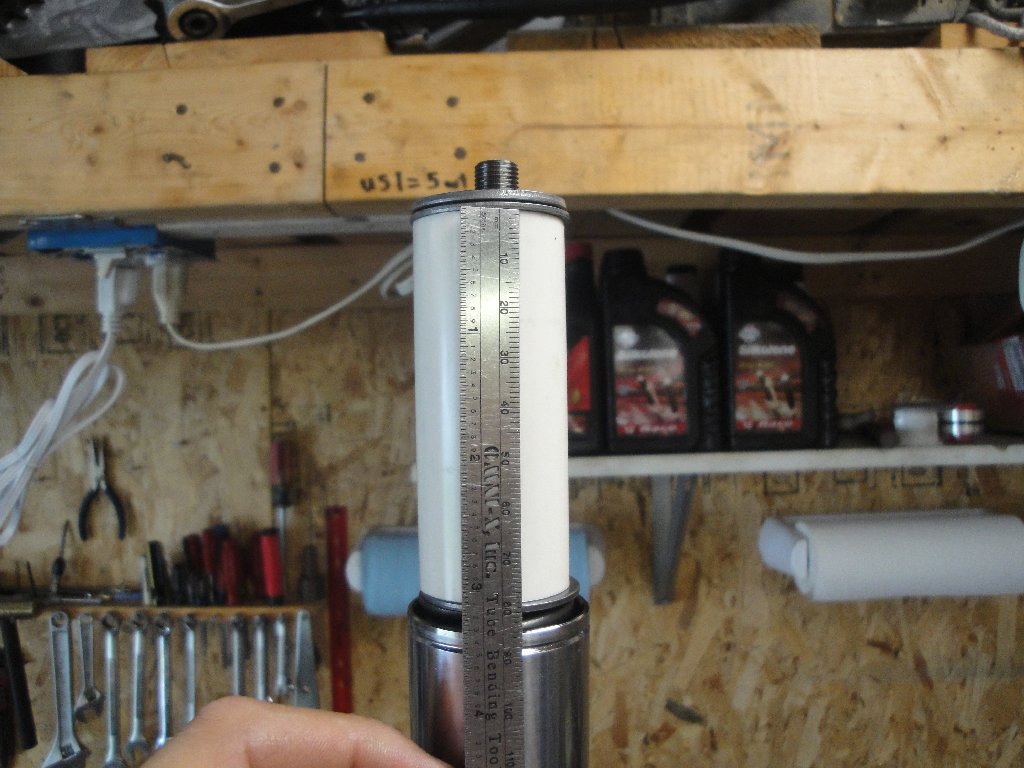
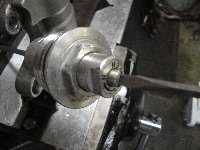
| Once you have
set the fluid it is now time to set the spring preload.
Start by sliding the new spring over
the damping rod making sure that it falls to the stop inside the
fork. Unless you have a special tool (like shown in the
pictures above) you will need to pull the damping rod all of the up
before dropping the spring down.
Use a spare piece of PVC pipe (or the
original spacer tube) as a starting point for the spacer
length. It's important that this spacer be longer than the
final required length but not so long that it compresses the spring
during this step. In this case I am using a tube that is 80mm
long. It might take a couple of iterations to get a good
starting point for the tube length.
Install one of the original washers,
the spacer, another washer, and the retaining plate (the c-shaped
washer). At this point check that you can still pull up on the
damping rod to ensure you aren't compressing the spring.
|
|
|
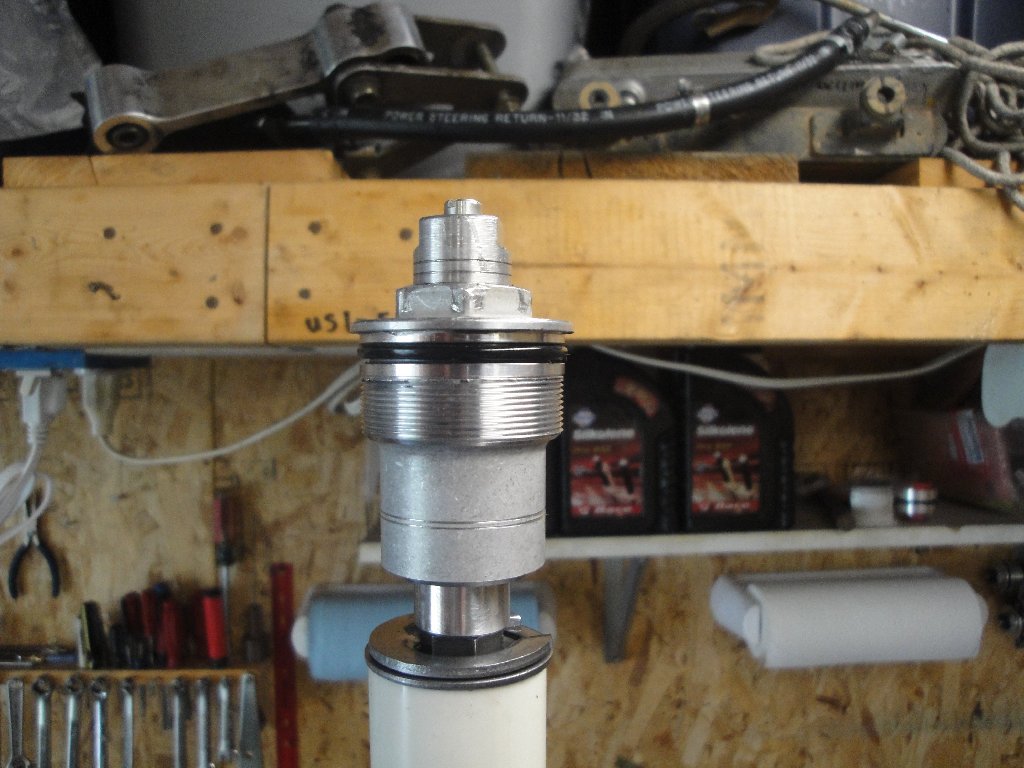
Install the fork cap to the damping
rod. At this stage it is not critical how far you thread the
cap on. Once threaded to the damping rod, turn the locking up
sp that is gently resting against the fork cap.
If equipped, set the spring preload
adjustment in the fork cap to approximately it's mid position of
travel. Your assembly should look like the picture to the
right.
|

|
|
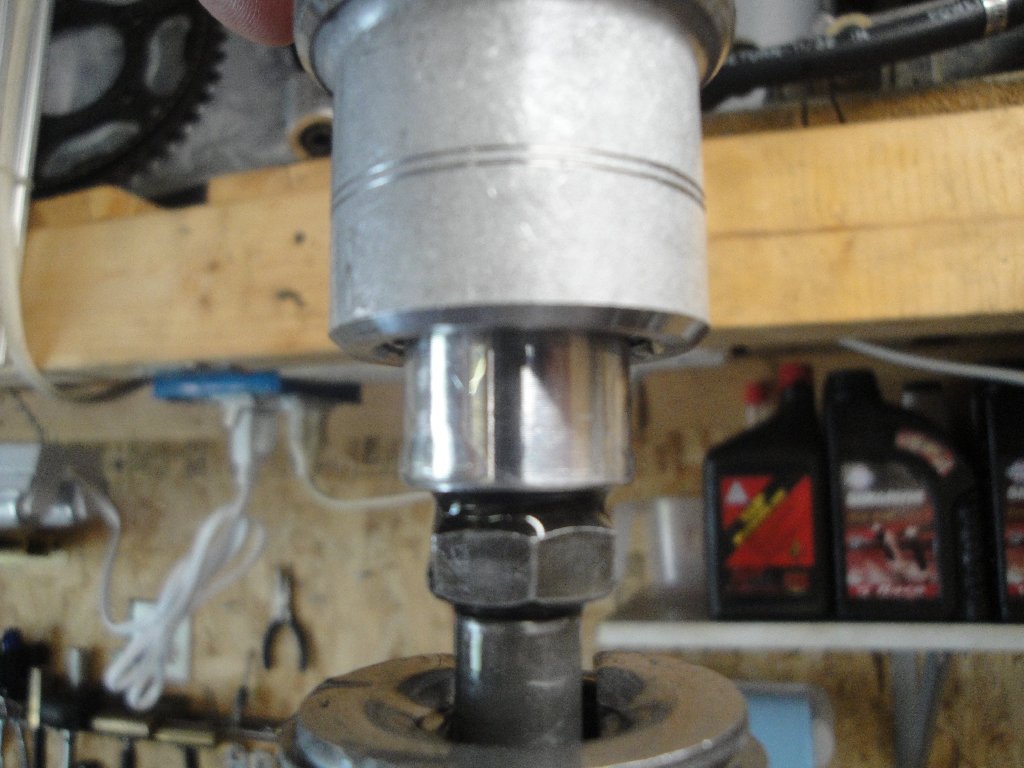
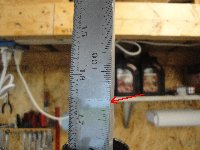
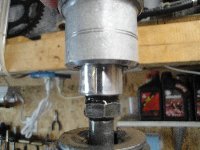
Pull the stanchion tube until it
stops. You will now make a measurement of the distance between
the top of the stanchion tube and the flange where it seats on the
fork cap. If you assembled the fork now this number would be
the spring preload - it's the distance the spring compresses to
install the cap. For most bikes the target spring preload is
16mm. As you can see in the picture I'm at 36mm, so that is
too much. Since my preload right now is 36mm and I want 16mm,
my spacer tube is 20mm too long (36-16=20).
From above, I started with a tube
that 80mm long. At this point I need to cut the tube down to
60mm (80-20=60) which should give me the correct length for this
application.
|
|
|
The next steps will finish the assembly
of the forks. This step is very often done incorrectly, so
it's important to take care (this only applies to forks that have
external rebound damping adjustments). Take the adjuster screw
and turn it out, counterclockwise, until it stops. From this
point start turning it back in while counting the revolutions.
Most bikes will have 2.5 to 3 turns of adjustment range.
|
|
|
With the adjustment screw turned in to
the desired position, thread the cap back on the damping rod until
the needle gently seats at the bottom. Do not
tighten the cap or you can damage the needle or valving inside the
fork. It is best to have the locking nut turned down as far as it
will go on the damping rod. You should see a gap between the locking nut and the
adjuster as shown to the right.
Gently tighten the locking nut
against the adjuster. Before tightening the nut, turn the
damping screw out about 1/2 turn. Tighten the locking nut.
Next is to thread the cap into the
stanchion tube and the forks are fully assembled.
Congratulations!
|
|
|
|
|
|
|